
How to Connect Xerox B310 Printer to WiFi?
January 24, 2025
WiFi allows the printer to connect to a network and print seamlessly from any device, be it Windows, Mac, Android, or iOS. Do you have a Xerox B310 printer? You can learn an easy way to connect Xerox printer to WiFi and print whatever you want. I am a printer expert with almost five years of experience in dealing with printer-related concerns. Throughout my professional journey, I have seen printer users struggling with how to connect the printer to WiFi. So, in this guide, I will share simple methods of connecting the printer to a wireless network.
Let's learn about three easy ways to connect a Xerox printer. Read them and choose the one which is efficient and time-saving for you. Once you have successfully connected the printer, you can add the printer to your device and print wirelessly.
Method 1: Using CentreWare Internet Services
CentreWare Internet Services provides a way to connect without a physical connection. Below, I am explaining the process with step-by-step instructions. You can use the CWIS method based on your network security settings.
- Firstly, turn on your computer and launch the web browser.
- In the next step, move to the address field and type in the printer's IP address.
- After that, tap on the Enter or Run button.
- Following this, type in your Administrator Account login details.
- Then, select Properties on the CWIS home page.
- Now, go to Connectivity, then Protocols.
- Afterward, look for wireless setup and Edit Settings.
- Type in the Network Name SSID & select WPA/WPA-2 Enterprise for Security Type.
- After that, select the Encryption type option.
- Now, choose the authentication method and complete the Root Certificate Setup.
- At last, select a protocol option for address acquisition and click on Apply.
I have helped Xerox printer users connect their printers with these simple steps. Connecting Xerox printer to WiFi becomes convenient with easy-to-follow procedures.
Method 2: Through Wireless Wizard
The second method I find efficient for almost all printer users is the Wireless Wizard. How do you go along with it? Pay attention to the below steps and connect your printer successfully.
- Initiate the process by moving to your printer.
- Turn on your Xerox B310 printer and open its Control Panel.
- Now, click on the Machine Status button on the Control Panel of your printer.
- After that, click on the Download arrow until you see the networks.
- Then, select WiFi and tap on the OK button.
- Select the wireless network name and type in the password in the WPA Key box.
- Next, you have to press the Apply tab.
- In the next step, click on the OK button and save your password.
- After that, you will see Connecting during connecting to your wireless network.
- Finally, the display will come to the Ready to Copy screen.
These steps are easy to execute. For more help, you can go to connectprintertowifi.com to find simple guidelines. Also, users can reach out to printer experts through calls or live chat from the support section of the website, providing 24/7 free consultations for any issues.
Method 3: With Xerox Easy Wireless Setup Program
You can use this method for Mac 10.14 or later. Execute these easy-to-follow steps to connect Xerox printer to WiFi.
- First, go to your printer's driver and downloads page.
- Now, download the Xerox B310 MacOS Utilities Printer Driver.
- Following this, install the Easy Printer Manager app (Product Manager) on your system.
- Now, go to the application and select your Xerox B310 printer model from the list.
- After that, choose the Machine Settings option.
- Then, move under the General Dropbox and set Network Connectivity to Wireless.
- Select Wizard inside the WiFi Settings and follow all the prompts.
It is one of the simplest methods of connecting the printer to WiFi. Thus, if you have a Mac computer, make sure to perform these steps correctly.
Method 4: Via WiFi Protected Setup
You can either use the PBC or PIN method to connect your printer to a WPS network. If you are a beginner and are looking for how to connect a Xerox printer to WiFi, follow these efficient instructions.
Option 1: Using the PBC Option
Push button connection is one of the easiest methods to connect the printer. Moreover, it is a secure way too.
- Initially, log in as a system administrator at your printer's control panel.
- Next, tap on the Home button.
- Then, go to Devices and Connectivity.
- Find WiFi and turn it on.
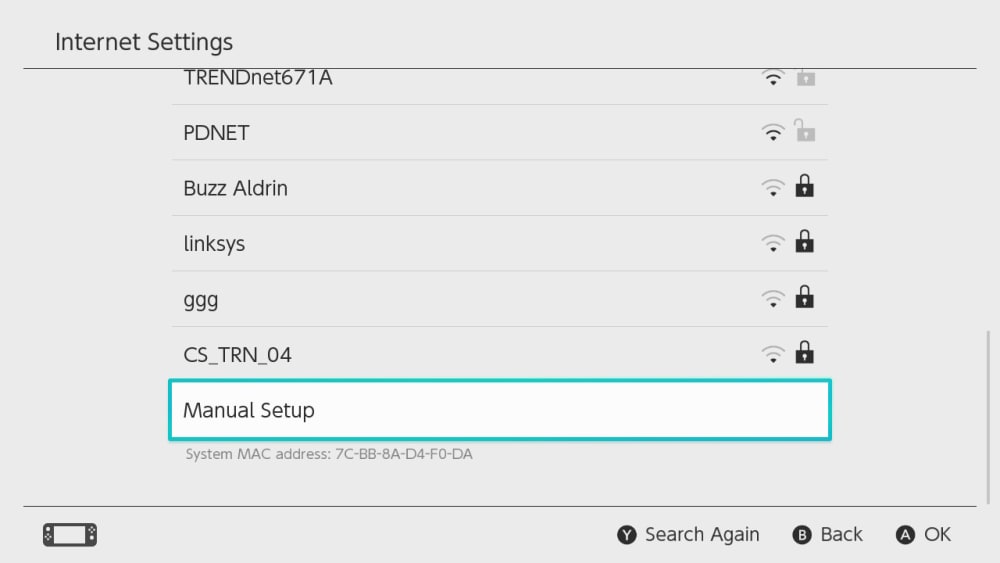
- Thereafter, touch Manual Setup and then WPS.
- Next, click on PBC and OK.
- After that, hit the WPS button on your wireless router.
- Finally, restart your Xerox B310 printer to activate the WiFi setting changes.
When your printer restarts, wait for approximately two minutes to allow it to get all the network information.
Option 2: With the PIN Code
Do you want to learn how to connect Xerox printer to WiFi using the PIN option? Find below the simple steps for this process.
- Initiate the process by logging in as a system administrator.
- Then, click on the Home button on your Xerox printer.
- Now, turn on your WiFi.
- After that, open the router's control panel and choose Add WPS Client.
- Then, select the PIN method.
- Afterward, go to Devices and Connectivity.
- Discover WiFi and tap on the Manual Setup.
- Then, touch the PIN and record it from the display.
- Now, type in your PIN code in the Client PIN Code field.
- Finally, click on OK.
After executing these steps, you will need to wait for at least 20 seconds. It is to get the IP address and a Configuration Report.
Conclusion
Wireless printer connection such as WiFi allows the printer to print efficiently from several devices. Xerox B310 printer users can print wirelessly by connecting the printer using the Xerox Easy Wireless Setup Program, WiFi Protected Setup, CentreWare Internet Services, or Wireless Wizard methods. All these methods to connect Xerox printer to WiFi are easy to perform. Thus, you can select the one depending on your system. After connecting to a successful network, you can use print efficiently from Windows, Mac, Android, or iOS devices.
Frequently Asked Questions
Question
How to Connect Xerox B310 Printer Through the Control Panel?
When you use the Control Panel, you will need to enter the WiFi information manually. Follow these simple steps for the process.
- In the initial step, go to Manual Setup.
- Now, type in the information and configure your WiFi
settings.
- Enter your SSID
network name.
- After that, click on OK.
- Select your router security option for security.
- Now, enter the password
and tap on OK.
- Finally, restart your printer.
Question
How to Connect Xerox Printer to WiFi on Windows?
Do you want to use your printer with your Windows computer? You can perform the below steps and connect the Xerox printer to WiFi.
- Firstly, install the
Xerox_B310_Windows_PrintDriver_Utilities_Signed.zip utility pack.
- Next, open the .setup.exe.
File.
- Tap on the Software.
- After that, read and agree to the License Agreement.
- Then, tick
Select Software in the menu.
- Lastly, click the Easy Wireless Setup box and click on Next.
Question
How to Connect Xerox B310 Printer Using Embedded Web Server?
If you find an Embedded Web Server method the most efficient one, you can go along with these steps. It will connect your printer to WiFi and allow you to print from anywhere.
- First, go to the Embedded Web Server home screen.
- Then, tap on Settings.
- Next, go to Network
or Ports.
- Select Wireless,
then.
- Now, select your WiFi network and type in the password.
- At last, click on Save.
Enter your Comments Here: